When it comes to Instagram, content is king. If you can create killer content, you have a much better chance of standing out from others in your niche and being able to work with brands.
Creating a cohesive Instagram theme shows that you take the platform seriously. It doesn’t mean that every photo has to match perfectly, but it helps people identify your photos by your editing style and helps brands know what to expect when they work with you.
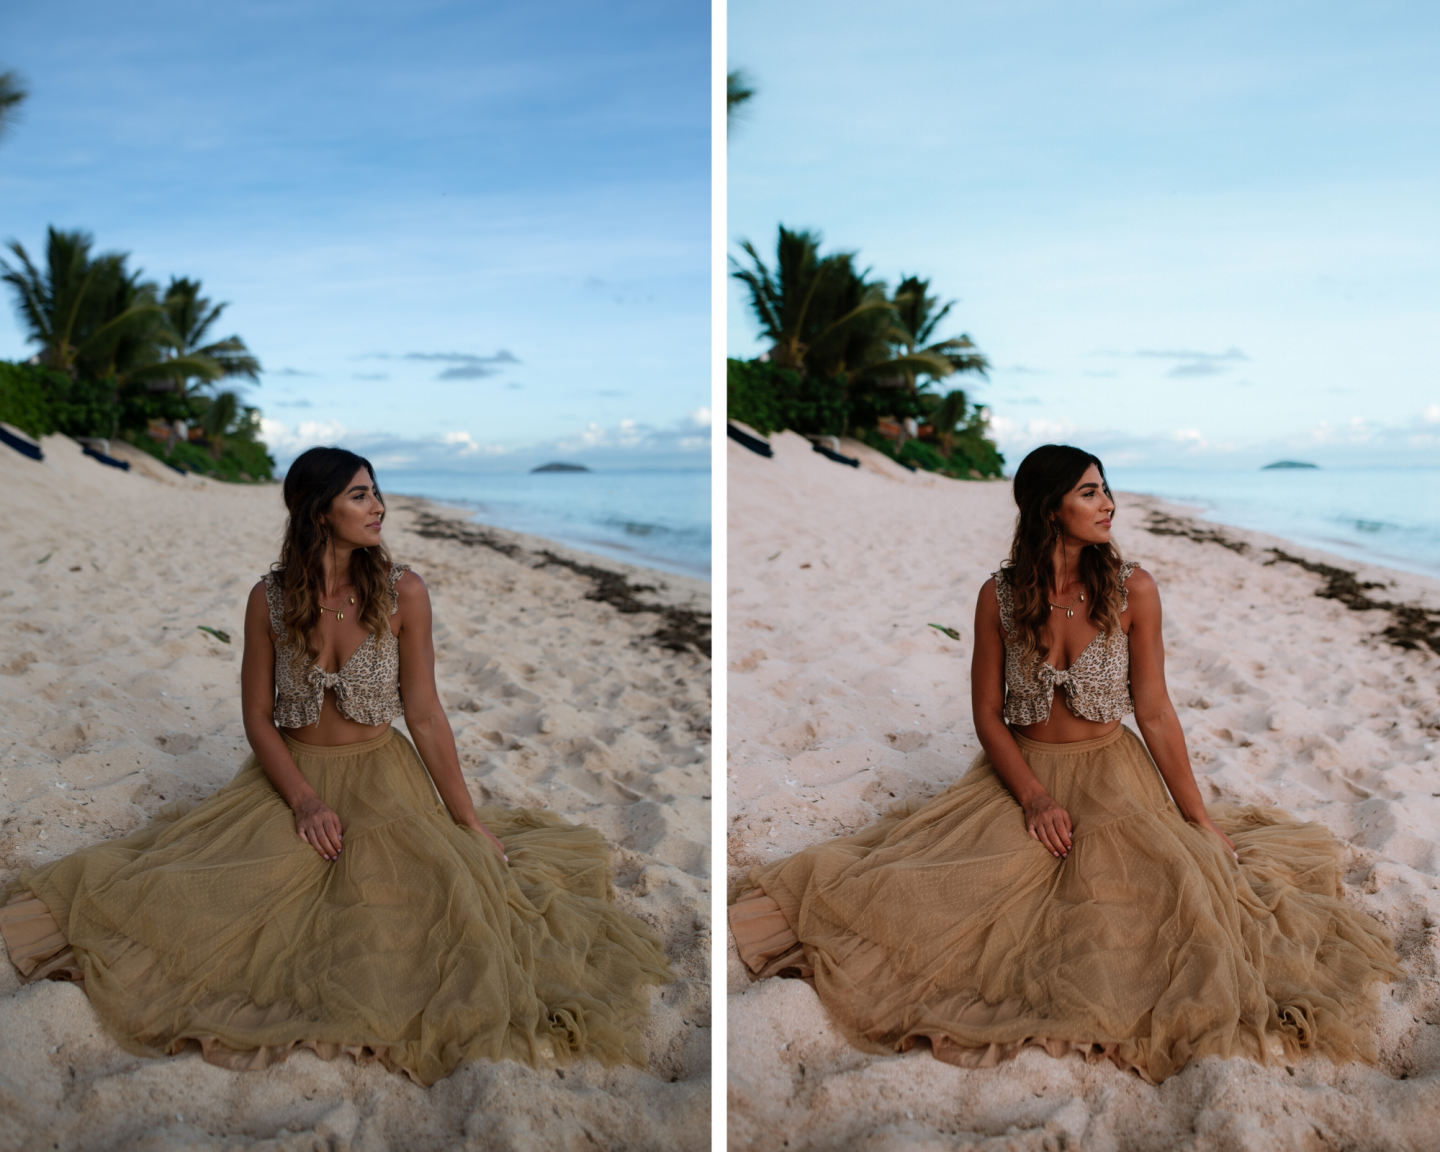
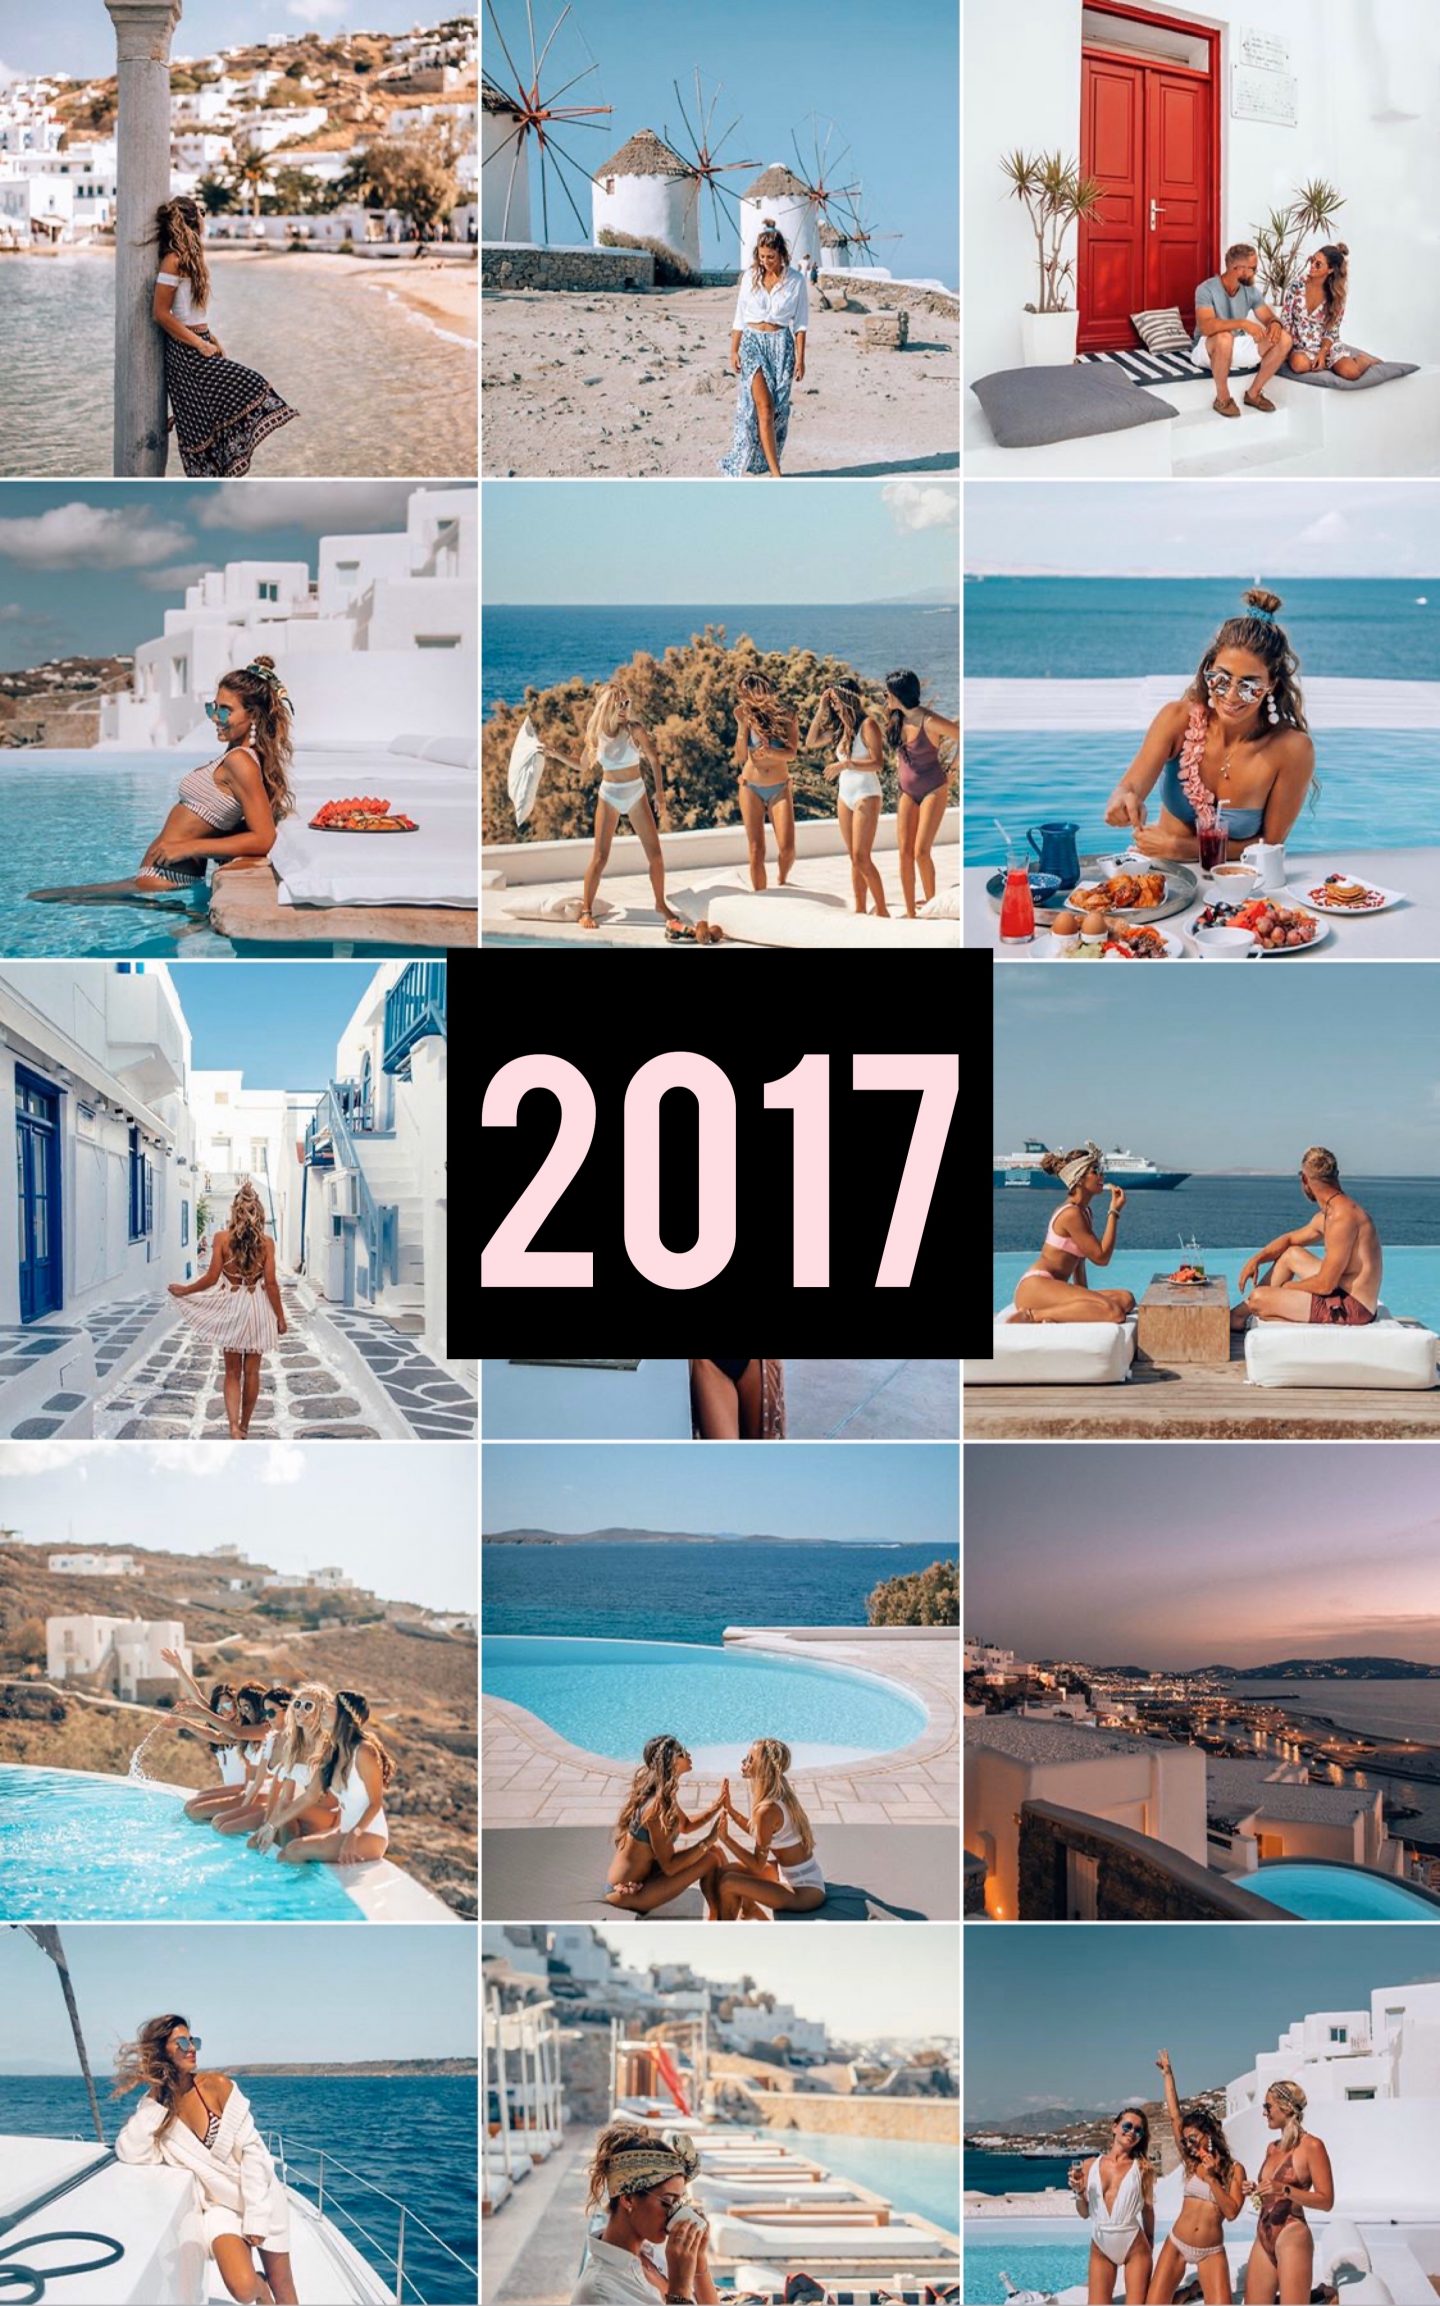
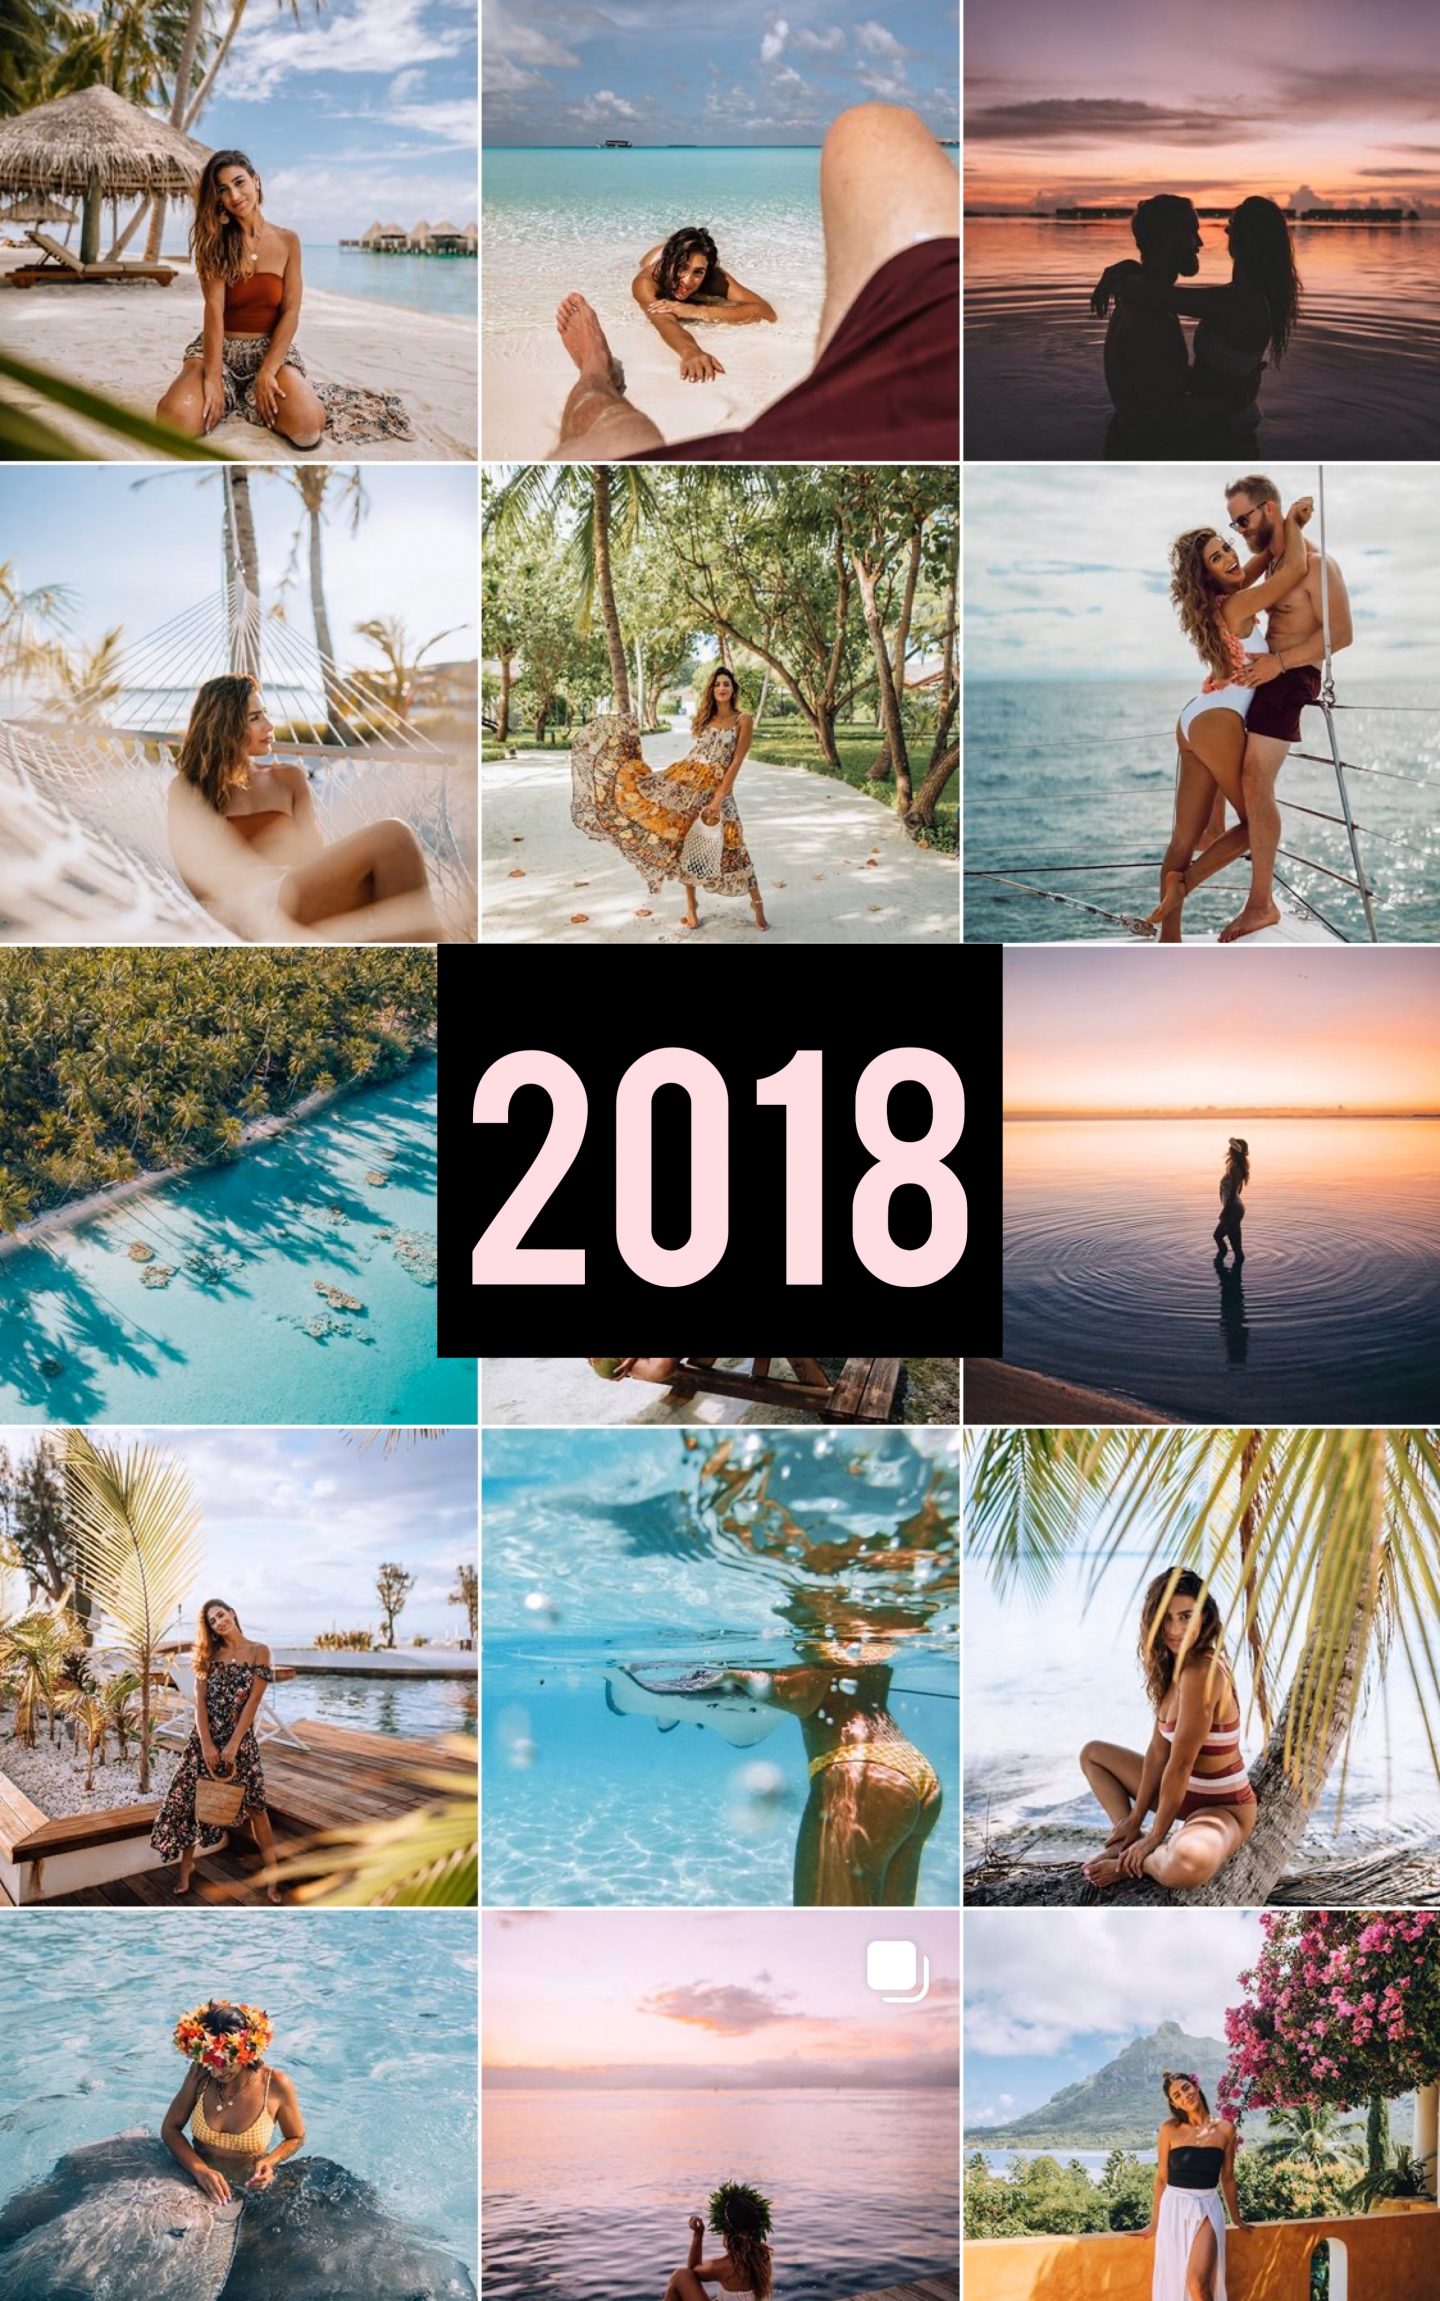
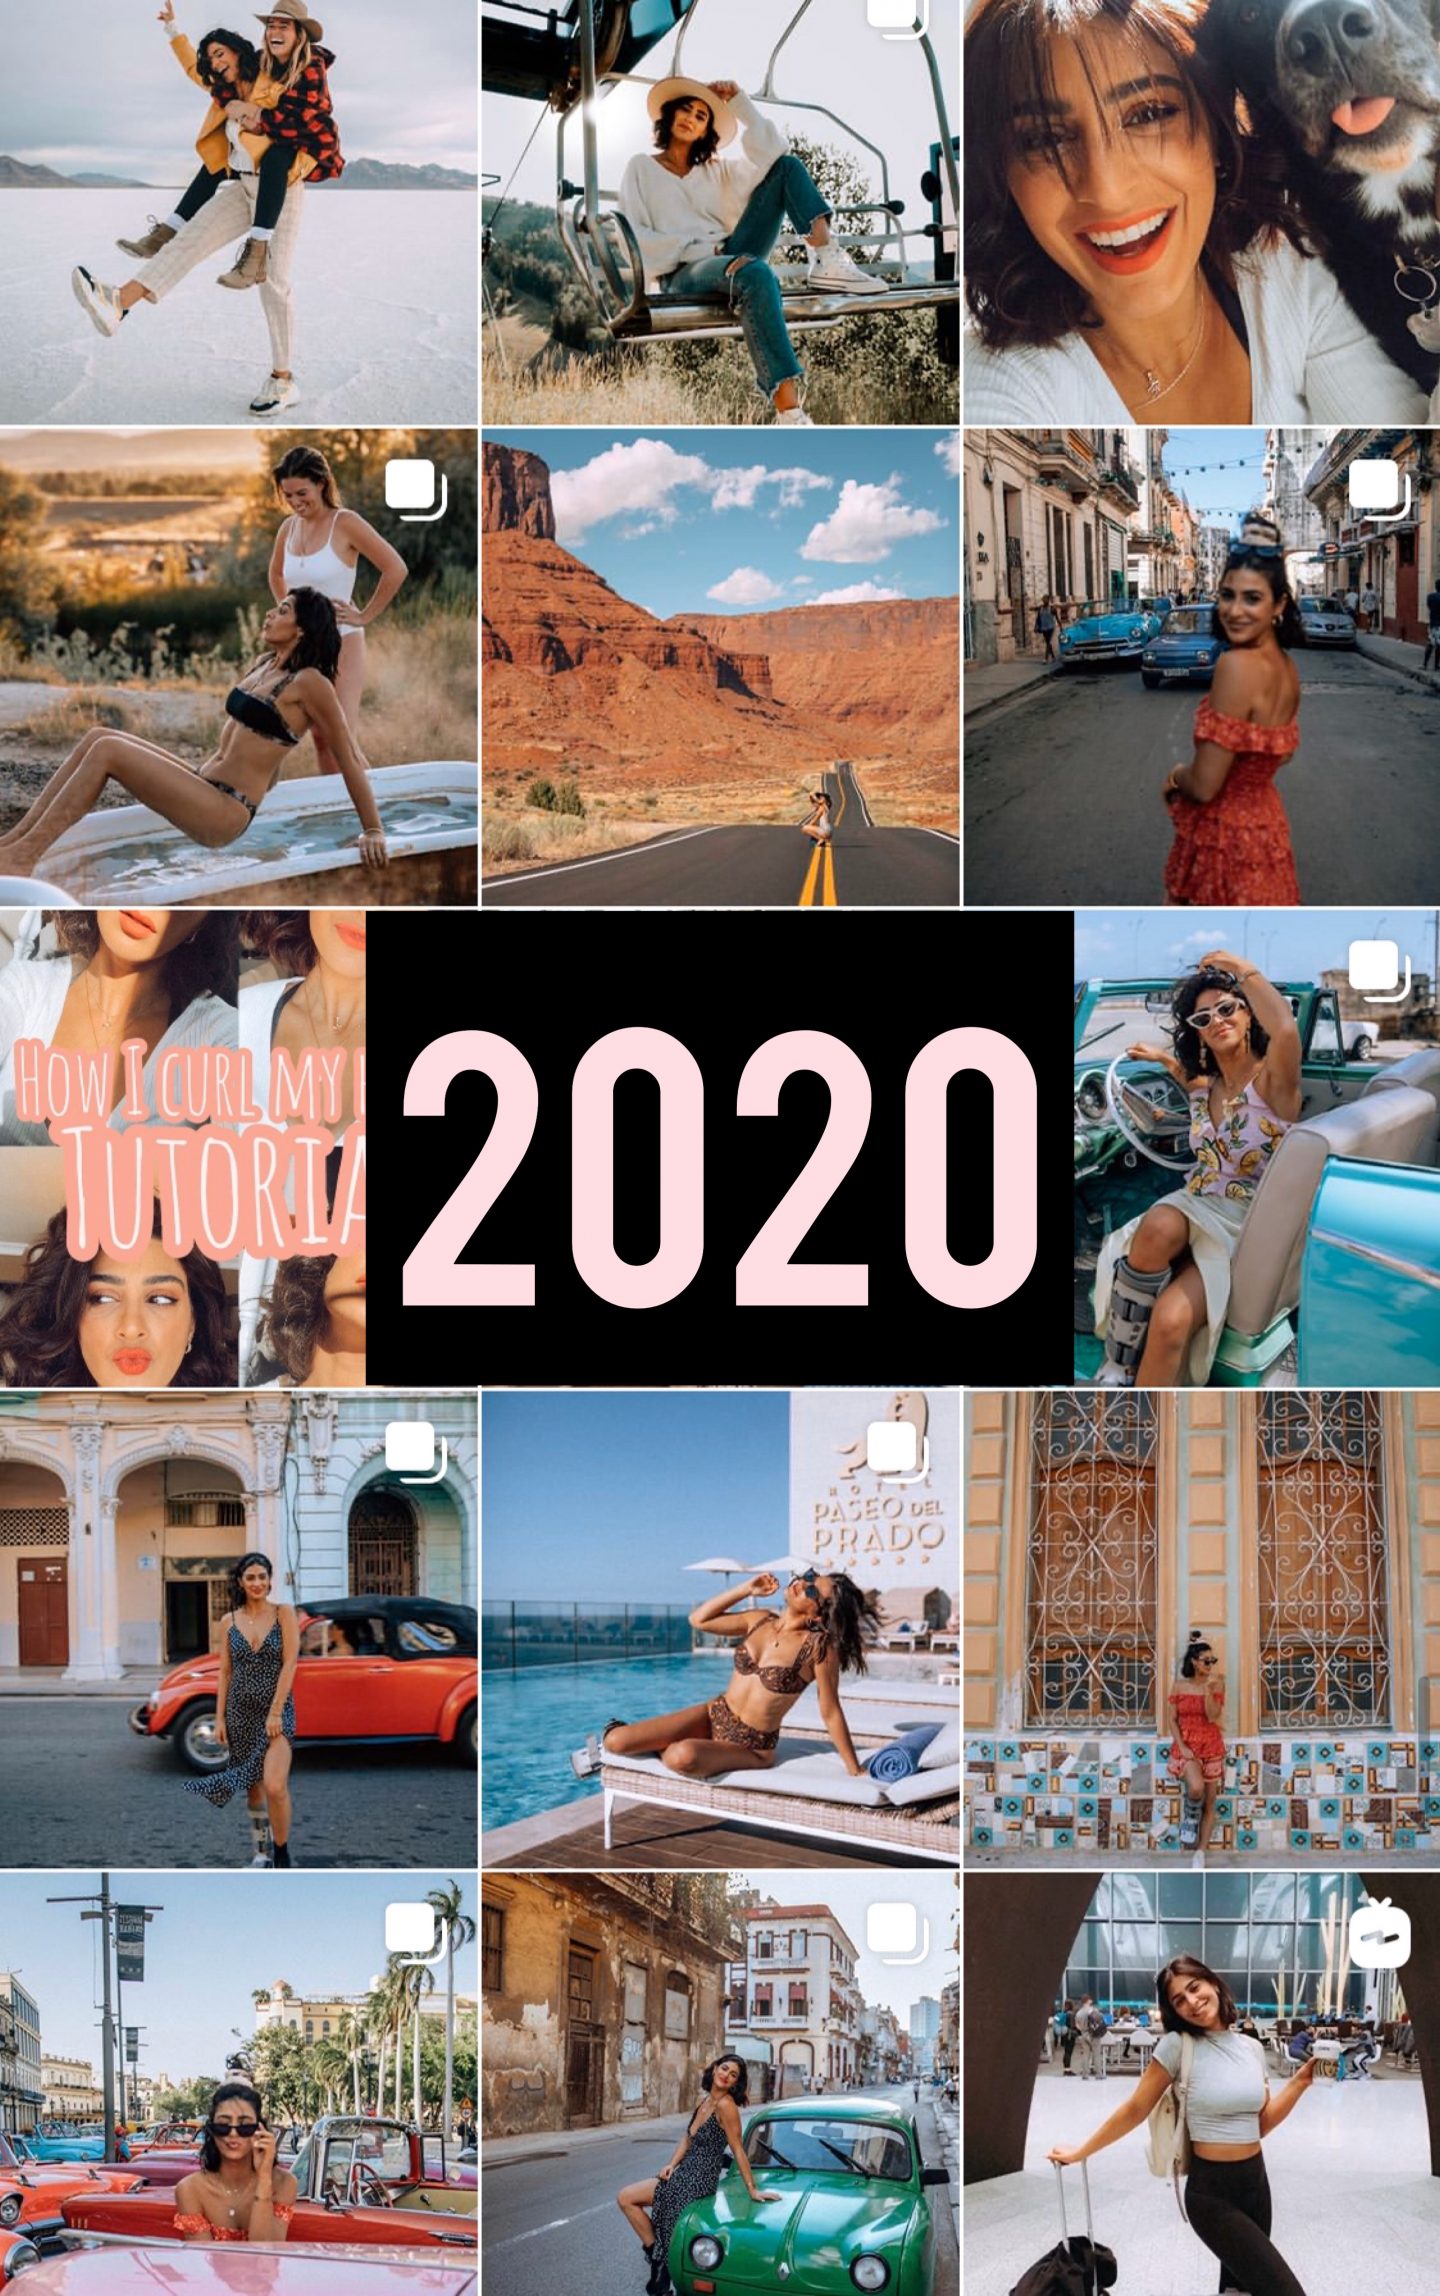
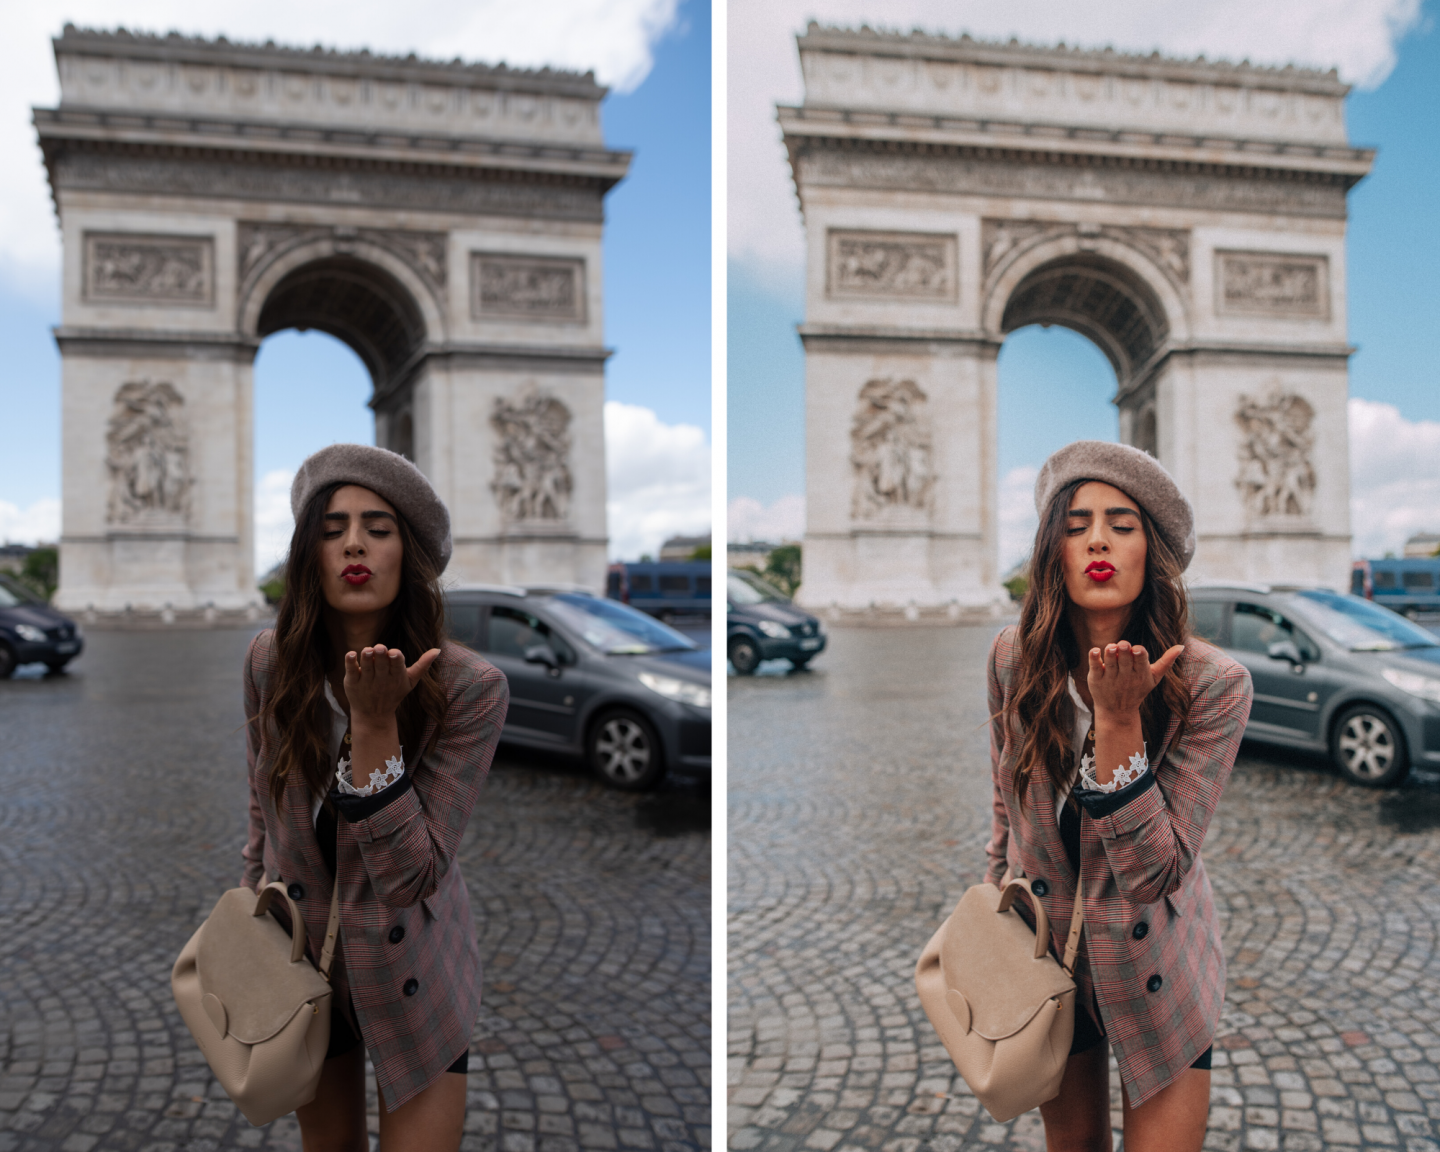
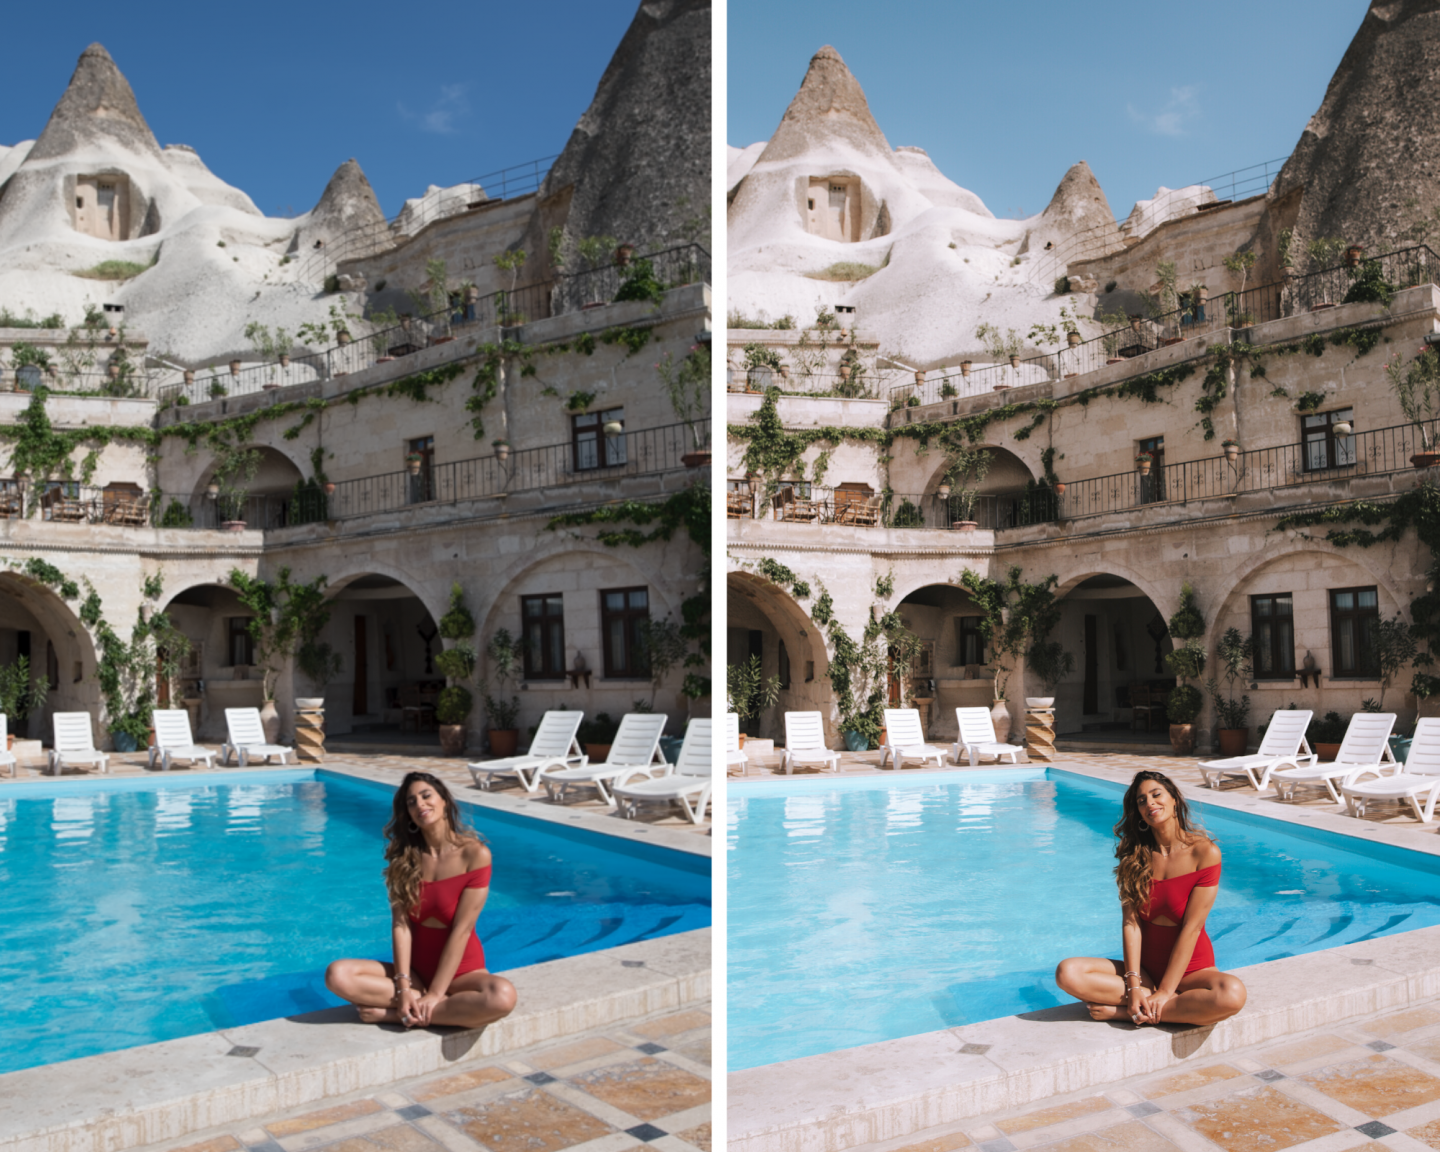
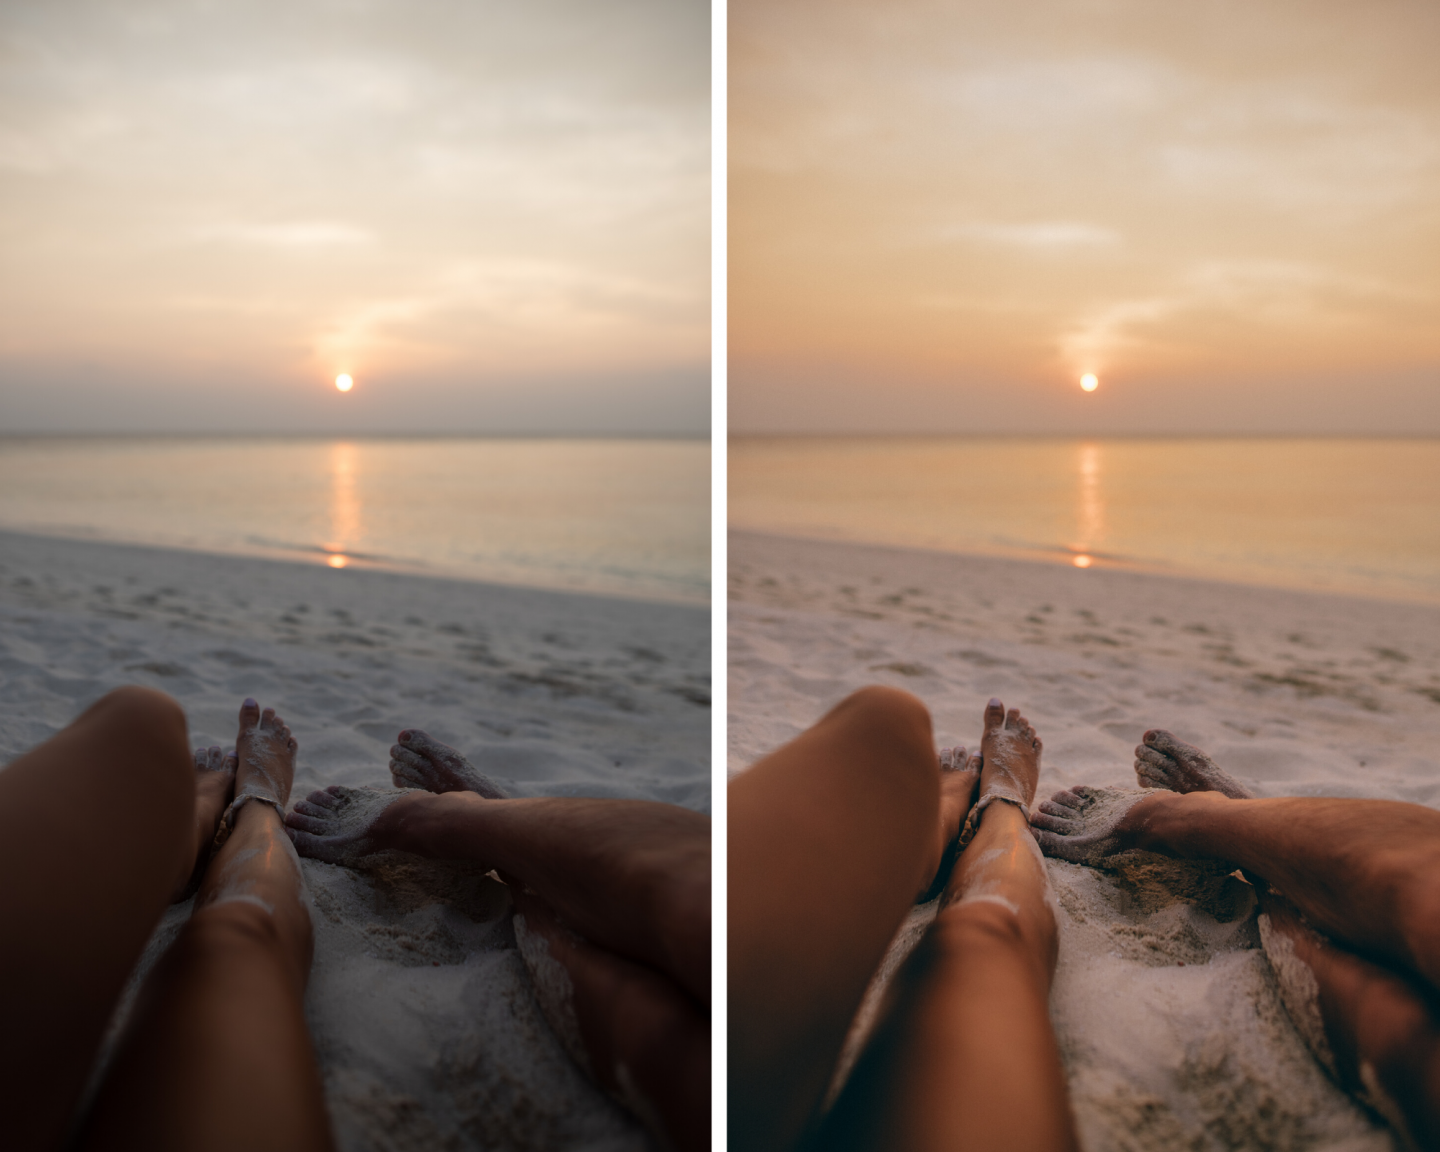
Using Lightroom presets for Instagram is a great way to step up your photo editing game (and the mobile version is FREE!). If you scroll way back through my Instagram feed, you’ll see how my editing style has changed over the years. Here are some examples:


While it has taken years to develop my current editing style, I’m here to help you find your style and figure out some quick tips for editing in Lightroom. These editing tips will help you use Lightroom presets for your Instagram feed as well as help you learn some little tips and tricks for editing even without Lightroom presets.
And as a bonus, I’m giving away a Lightroom preset for FREE! Just sign up below to get my FREE mobile + desktop version emailed to you today!
Plus, you can shop the Lightroom presets I’m currently using on my feed here!
When it comes to editing in Lightroom, it can be a bit overwhelming. Trust me I had my battles at the beginning with the app. While presets can help speed the process up, each photo will usually need some tweaks whether you use presets or not. From exposure to coloring, here are the top tools and tips I use to edit my photos in Lightroom for Instagram.
More of a visual learner? Here is my YouTube video walking you through these same editing options.
#1: Shooting Photos for Lightroom
Before you even get into editing in Lightroom, there are a couple of things you can do to make it easier to edit your photos. First, always shoot in RAW when shooting with a camera. RAW gives you more power in editing to process the photo and get it to turn out how you want it to look. Shooting in Lightroom Mobile if you use your phone gives you this option.
Also, try to underexpose your images just a little bit. You don’t want it to be too dark, but make sure the brightest part of the image isn’t washed out. You can’t recover the data if a part of the image is blown out or completely blacked out, so you want to keep an eye on both ends of the spectrum. Personally I find shooting slightly darker makes it easier to edit it later and brighten it up while saving the colors and brighter parts of the photo.
#2: Crop & Straighten Horizontal Lines
Sometimes you find a great photo you want to use only to realize the horizon or another equally important horizontal line is crooked. In the moment of shooting, you may not have realized that the camera wasn’t quite straight, but don’t worry. This is super easy to fix.
Start by cropping your photos to a 4 x 5 or 8 x 10 portrait size. This ensures you know exactly what you are working with for Instagram.
Then go into the Crop Overlay again and click on the Straighten Tool (to the right of the word “Angle”). This ruler lets you click a spot and drag it across the line that should be level. Once you let go, the photo is automatically straightened for you.

#3: Adjust the Exposure
You will pretty much always have to adjust the exposure for every photo whether you use a preset or not. This is because the light and the settings will be different. Even if you shoot multiple images in the same location, you might find that different exposures are needed as the light changes.
Since some presets already have adjusted the exposure to fit the creators typical shooting style, you may find that you need to brighten or darken them once you apply them to your photos.
Make small adjustments in exposure as sometimes adjusting the other settings may brighten or darken the image as well. You can always come back and adjust it more later.

#4 Adjusting Skin Tone in Lightroom
I love having a tan. I try to travel to tropical destinations and warm destinations as often as possible, but sometimes my tan needs a little help. Photos sometimes wash out your skin tone, so presets and Lightroom editing can give you a tan if needed.
Start out by learning your skins undertones. It won’t be hard to figure out once you have a photo of yourself in Lightroom. I’m olive skin so my skin typically falls into the orange tones. If I adjust the orange hue, saturation, and luminance, I can adjust my skin’s color in the photo.
Your skin may have more reds or yellows, so play around and see what works. Be aware of other parts of the photo that are impacted by your adjustments to your skin tone though.
For my skin, I typically shift the orange hue slightly to the red side. I also tend to decrease the saturation just a little bit and to increase or decrease the luminance to get the right level of tan for the lighting in the photo.

#5: Adjusting the Blue in the Sky
Depending on the time of day, the sky can be either a very dark blue or a very light blue. If you are shooting in more harsh sunlight or if you have a beach photo with turquoise water in it, you may want to lighten the blue of the sky some.
If you need to adjust the blue for the sky, start out adjusting the highlights. Bring the highlights down to darken a sky that is too bright or slightly blown out. Bring the highlights up to lighten a darker sky and make it not as harsh of a blue.
You can also go into the HSL/Color options and go to the blue color (not the turquoise one). Adjust the color to get the color blue you want and then play with saturation and luminance to brighten the sky. Bringing up the luminance will brighten the sky while bringing down the saturation removes the color from the sky.
#6 Editing Water in Your Photos
The above photo also shows an example of editing the water in the photo. Sometimes you have a gorgeous beach photo with turquoise water and a blue sky. We covered adjusting the sky, but sometimes you want to enhance the water to bring out the deep colors you remember.
For ocean water, you typically will play more with the turquoise. I try not to have my water and sky too close in color, so I use the hue on the turquoise for the water and the blue for the sky to make sure the colors look right together.
Depending on the photo and the look you are going for, you may need to brighten the turquoise in the water by increasing the luminance or you may want to bring out more of the color by lowering the luminance and/or increasing the saturation.

#7 Adjusting Colors to Make a Cohesive Feed
When you make adjustments to a photo or to a preset, this is the part where creating a cohesive feed comes in. You don’t want to have really bright colors in one photo and really muted colors in the next. How you edit colors is an easy way to create a cohesive look.
For example, start with the temperature and tint of the photo. Do you like photos that are warmer or cooler? I typically make my photos a little warmer and adjust the tint towards the purple side very slightly instead of the green side.
Then think about the colors overall. Do you like pastels, bright colors, muted colors, darker colors, etc.? Do you like brighter or darker edits? For blues, do you want them to be more true blue or more turquoise? Do you want your greens more towards the yellow side or more towards the blue/turquoise side? What about your oranges – more pink or more orange?

All of these decisions will impact your editing style. The important thing to remember is that you can keep adjusting and keep learning along the way. You don’t have to pick a style today and stick with it forever.
Use the style you like to edit your photos and to adjust your colors. If you want more muted colors, play with the saturation. For brighter colors, play with saturation and luminance. If you want to just enhance the colors but not drastically change them, keep your edits closer to the middle with just small adjustments here and there for the most part.
Don’t be afraid to play with the colors and adjust the presets to make them work for you. You do not have to stick with the initial look a preset gives a photo.

#8 Editing Indoor Photos
Indoor photos can be the trickiest to edit because the light is so different. Typically you have to edit indoor photos to have a slightly cooler temperature and adjust the tint based on the color of the light.
For example, in this diner photo, I had to leave the temperature much cooler than most of my photos and adjust the tint away from the green side to take out some of the green in the bench and in Aggie’s blonde hair. Adding a little warmth helped bring out our tans and made our shirts not quite so blue as well.

#9 Editing Sunrise/ Sunsets
Sunrise and sunsets are some of my favourite moments to capture, but sometimes they can be tricky to get that golden light just right.
Often times I’ll want to enhance the colours in the sky without affecting the entire image by using the white balance (temperature/ tint).
Start by editing your photo as you normally would to get the rest of the image to a place you’re happy with. If you’re editing a beachy picture like below, you want to make sure the sand and skin tone aren’t too saturated.
Then go to the Gradient Filter (this allows you to edit a certain section of the image without affecting the rest of it). Start at the top and drag it down. Once you let go, the selected part will show in red. That’s the section you are working with.

Now that you are just effecting the sky, it’s time to make it POP! If I’m going for a warm orange sunset then enhance the temperature and the tint. If the sun has already gone down and I want to bring out the purples then make the temperature cooler but keep the tint in the pink tones.
*****
Now it’s time for you to start playing with your photos. Remember, don’t be afraid to start from scratch and find your style or to start with a preset and make adjustments from there. One preset will not work perfectly on every photo, so make some adjustments to bring out the colors and the look that you love.
If you haven’t already gotten my free preset, make sure to sign up below to get it emailed to you. Check out the rest of my presets here. Don’t forget to use #presetsbylisa and to tag @presetsbylisa so I can see and share your edits!
For more Instagram tips, don’t miss my tips for capturing the perfect Instagram photo (and writing an engaging caption). And if you love this post, make sure to share it using the pin and share buttons below!
xx Lisa
***A little reminder that if you are creating your own presets to sell or give away, make sure you start from scratch. I’ve worked hard to create my presets, and it is illegal to resell my presets or tweak them to sell them as your own.
Like this post? Pin it for later and share it with others!

I love ur previous preset . Its so useful for my photos.
Looking for the new one and excited to try it.
Thank you lisa ❤️
Author
Yayyyy I cannot wait to hear your feedback!!!
I really love your work! I think you made an incredible photos with your presets! Thank you for sharing your work with others!
Author
Thank you soooo much!!!! Happy editing I’m so excited for you to start editing
So weird to read this how-to lightroom editing! Usually its shared through videos and ive always missed few points or forgotten about them. Appreciating this content so much! x
Author
Yeah well i have 2 YouTube videos but I thought this would be a great alternative to someone who prefers reading and I can include this as a tutorial when people purchase presets